How To Enable Text Compression On WordPress

Text compression is a crucial step in optimizing your WordPress site for speed and performance.
By compressing text files, such as HTML, CSS, and JavaScript, you can reduce the size of these files, which in turn reduces the amount of time it takes for your website to load.
This can lead to improved user experience and better SEO rankings. In this guide, we’ll walk you through the steps to enable text compression on your WordPress site.
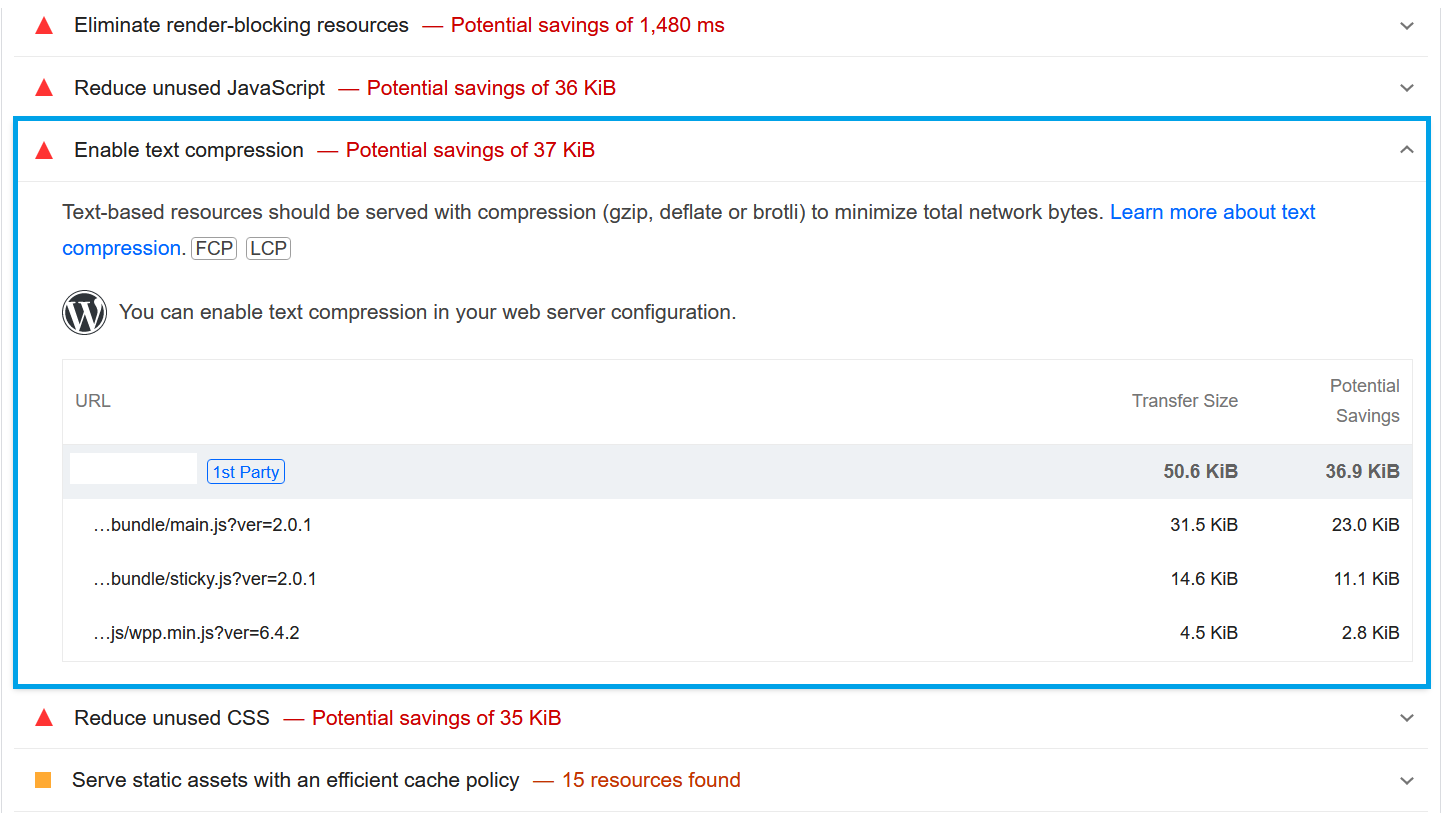
What is text compression?
Text compression, commonly referred to as Gzip or Brotli compression, is a technique used to minimize the size of text files transmitted from a web server to a user’s browser.
By reducing the file size, text compression will improve the performance of WordPress sites, as well as any other web application, making it a crucial aspect of web optimization.
When a user requests a webpage, the server processes this request and sends the necessary files, such as HTML, CSS, and JavaScript, to the user’s browser. Without compression, these files can be quite large, especially for complex websites, leading to slower load times and increased data usage. Text compression addresses this issue by shrinking the files before transmission.
Here’s how it works:
- Server-side compression: When a server receives a request for a webpage, it compresses the text files using algorithms like Gzip or Brotli. These algorithms work by finding and eliminating redundancies within the text files, which effectively reduces their size. For example, repeated words or phrases are stored more efficiently, and common patterns are encoded in a way that takes up less space.
- Transmission: The compressed files are then sent over the internet to the user’s browser. Because the files are smaller, they travel faster and consume less bandwidth. This is particularly beneficial for users on slower networks or those with limited data plans.
- Client-side decompression: Upon receiving the compressed files, the user’s browser automatically decompresses them. Modern browsers are equipped with built-in capabilities to handle Gzip and Brotli compression, ensuring that the decompression process is seamless and invisible to the user.
Why enable text compression?
The benefits of text compression are significant:
✅ Reduced load times: Smaller file sizes mean quicker downloads, leading to faster webpage loading times. This is critical for user experience, as faster websites are more likely to retain visitors and reduce bounce rates.
✅ Lower bandwidth usage: By transmitting compressed files, websites can significantly cut down on the amount of data sent over the network. This not only reduces costs for website operators but also benefits users who might be on limited data plans.
✅ Improved SEO: Search engines like Google take page load times into account when ranking websites. Faster websites are often ranked higher, making text compression a valuable tool for improving search engine optimization (SEO).
✅ Enhanced user experience: With faster load times and efficient data usage, users are more likely to have a positive experience on the website. This can lead to higher engagement, better conversion rates, and overall user satisfaction.
How to verify if compression is enabled
By using an online tool
Before you enable compression, it’s a good idea to check if it’s already enabled on your server.
You can use online tools like GTmetrix or Google PageSpeed Insights to check your website’s performance and to see if you get any recommendations to enable text compression.
Another easy tool to use is GZIP Compression Test by GiftOfSpeed.
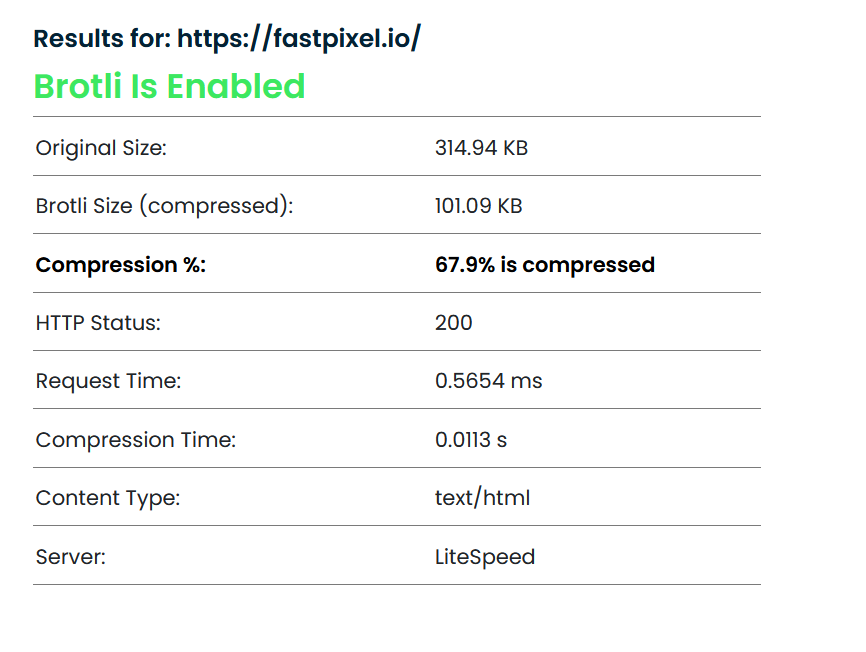
Manually by using the browser’s developer tools
Most developers use this method. It may seem complicated at first, but once you’re familiar with the Inspect tool, it becomes straightforward.
To begin, open your browser—I’ll be using Chrome, but this method applies to any browser, though the option names might vary slightly.
- Open your website in the browser, then right-click anywhere on the browser window and select “Inspect.”
- A pane will open on the side or bottom of your screen. This pane includes several tabs, such as Elements, Console, Sources, Network, and so on.
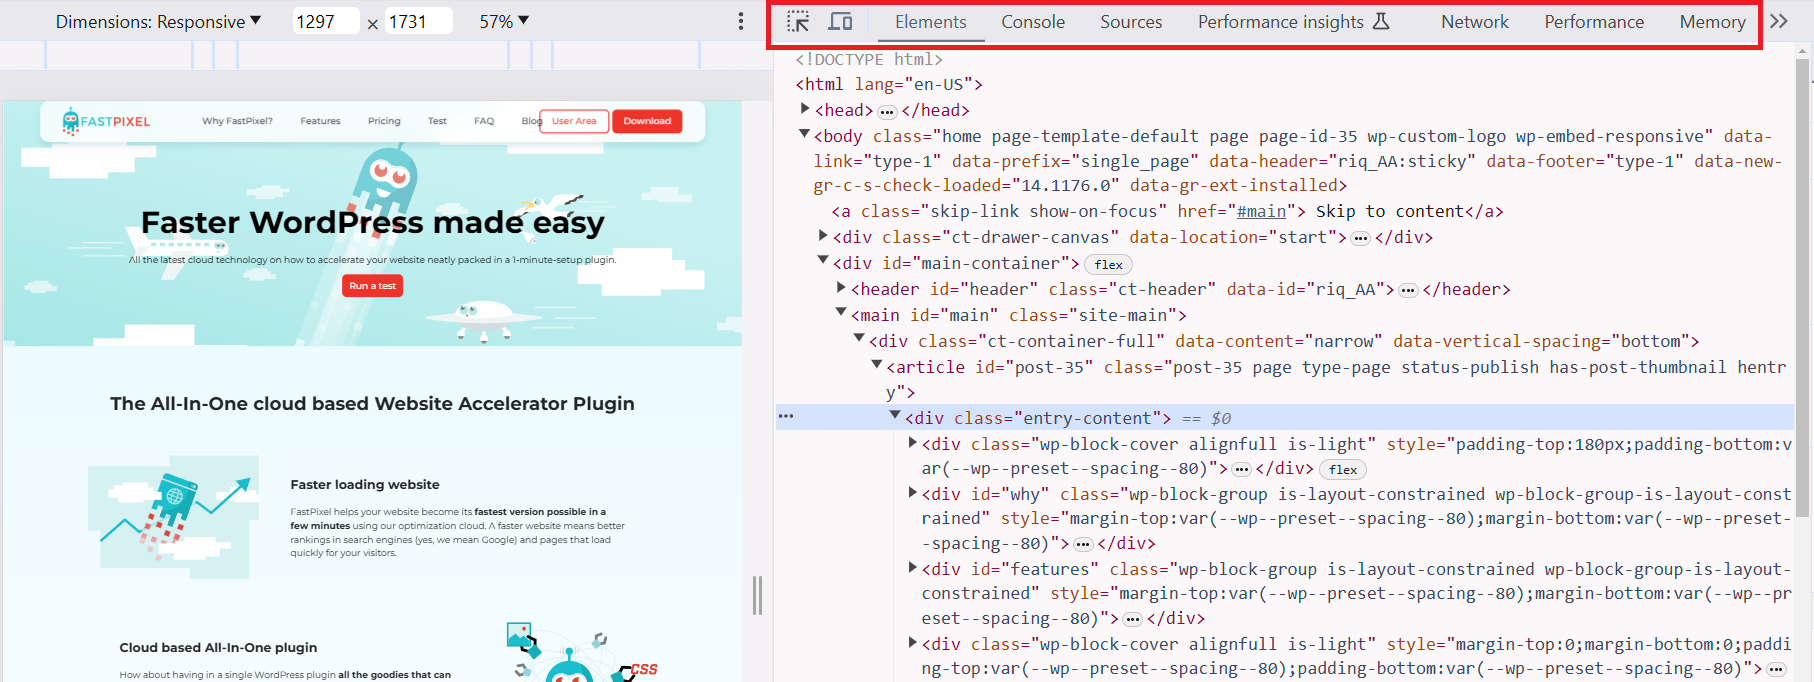
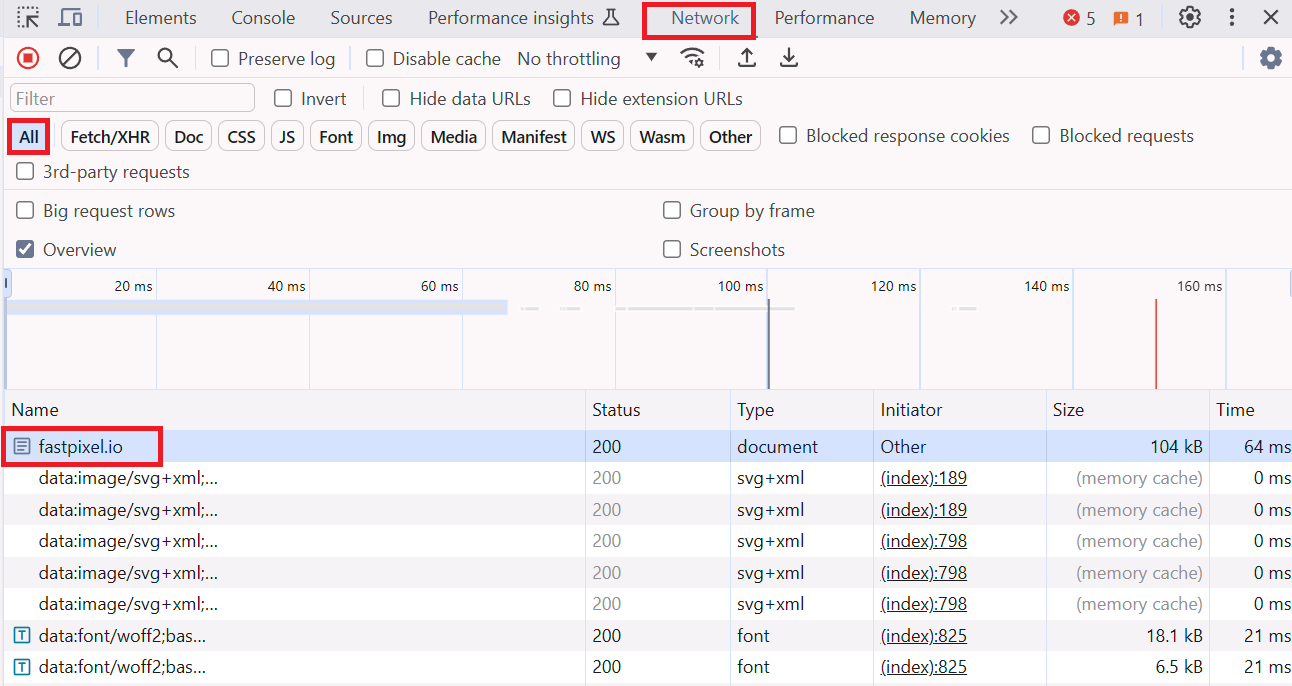
Accessing the network tab:
- Click on the “Network” tab, then select “All” to view all the resources.
- Refresh the page, and the network tab will populate with various records.
- Check the top of the list to find the first record, which should be the name of your domain.
Examining the request headers:
- Click on this first record.
- In the “Request Headers” section, locate the “accept-encoding” header. This header shows what types of compression your browser can handle. If this header is missing, try using a different browser, as the server won’t compress data without it.
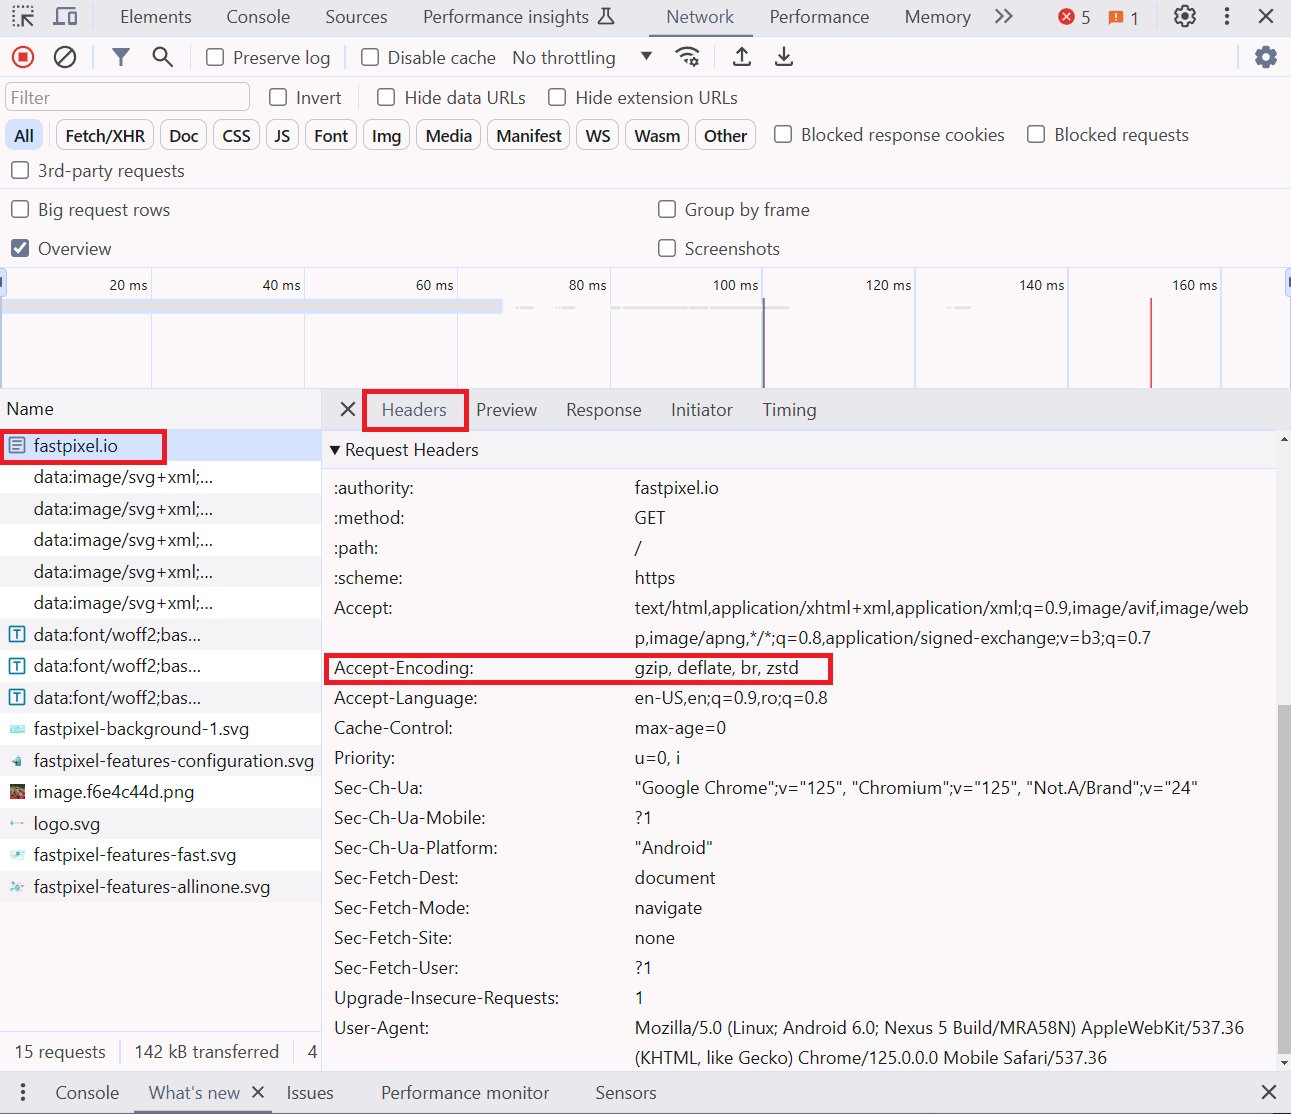
Inspecting the response headers:
In the same record, look for the “content-encoding” header in the “Response Headers” section. This header indicates the type of compression the server used before sending the website’s data to your browser.
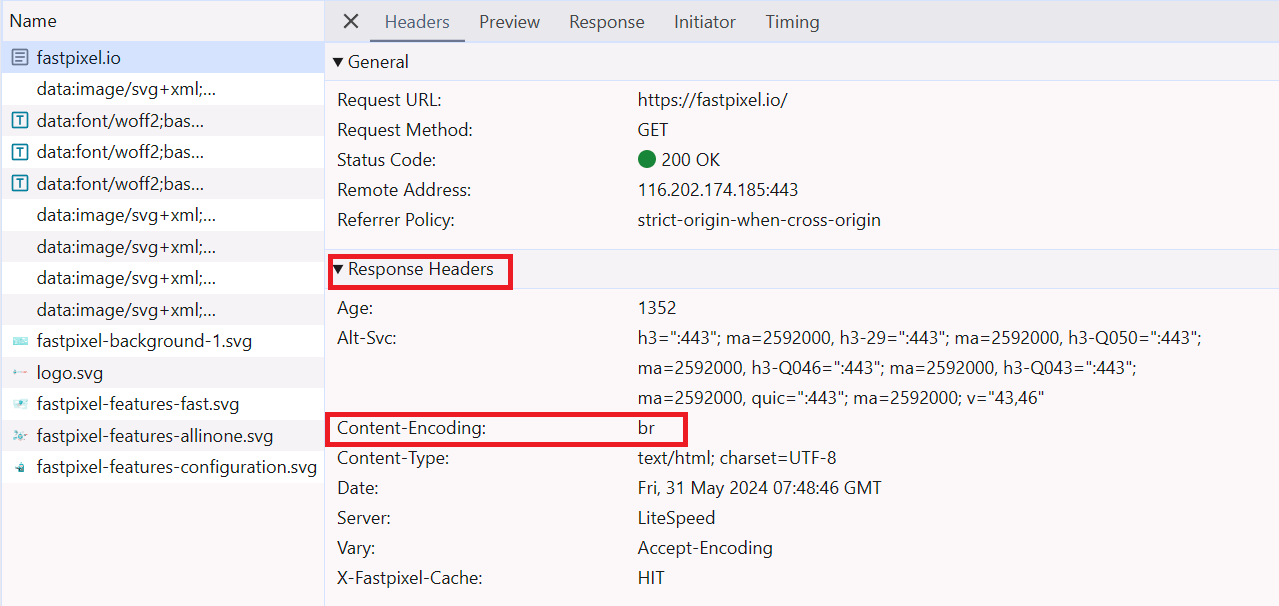
In my case, “br” content encoding refers to Brotli, which indicates that text compression is enabled!
How to enable text compression
Enable compression via .htaccess
If you’re using an Apache server, you can enable text compression by adding some code to your .htaccess file. Here’s how:
- Access .htaccess file:
- You can access your
.htaccessfile via an FTP client like FileZilla or through your hosting provider’s file manager.
- You can access your
- Add the snippet below:
- Open the
.htaccessfile and add the following code, before the the # END WordPress line:
- Open the
<IfModule mod_deflate.c>
AddOutputFilterByType DEFLATE text/plain
AddOutputFilterByType DEFLATE text/html
AddOutputFilterByType DEFLATE text/xml
AddOutputFilterByType DEFLATE text/css
AddOutputFilterByType DEFLATE application/xml
AddOutputFilterByType DEFLATE application/xhtml+xml
AddOutputFilterByType DEFLATE application/rss+xml
AddOutputFilterByType DEFLATE application/javascript
AddOutputFilterByType DEFLATE application/x-javascript
</IfModule>
Enable compression with a WordPress plugin
If you’re not comfortable editing the .htaccess file, you can use a WordPress plugin to enable compression.
Besides text compression, FastPixel offers a variety of other features to boost the performance of your WordPress site.
👉 For our Japanese readers, you can also find a local plugin option at SiteProducts.jp, which offers WordPress tools tailored to performance and optimization needs.
FastPixel not only compresses HTML, CSS, and JavaScript files but also optimizes images, leverages browser caching, and minifies resources. These combined optimizations can lead to faster page load times, improved SEO rankings, and a better user experience for your visitors.
Wrap up
Enabling text compression is a simple yet effective way to improve your WordPress site’s performance.
Whether you choose to edit your .htaccess file or use a plugin such as FastPixel, the benefits of faster load times and reduced bandwidth usage make this optimization step well worth the effort.
By following the simple steps outlined in this guide, you can ensure that your WordPress site is running efficiently and providing the best possible experience for your users.
Slow website?
Take control of your site’s performance today with efficient text compression. Give FastPixel a try for free!